

Android Jetpack Compose之底部导航栏的实现
目录
- 1.概述
- 2. 效果展示
- 3. 代码实现
- 3.1 定义底部导航栏的tab项
- 3.2 整体页面架构搭建
- 3.3 底部导航栏的实现
- 3.4 所有代码
- 4.总结
1.概述
写过一段Android jetpack compose 界面的小伙伴应该都用过Compose的脚手架Scaffold,利用它我们可以很快的实现一个现代APP的主流界面架构,即一个带顶部导航栏和底部导航栏的界面架构,我们基于这个架构可以快速的搭建出我们想要的页面效果。而今天的文章就是要介绍如何实现一个有特点的底部导航栏。底部导航栏一般都是在界面的最底部有可供切换的几个按钮,点击对应的按钮可以切换到对应的页面,例如微信的底部导航栏,分为“微信、通讯录、发现、我”四个选项,这四个选项也比较中规中矩,使用Compose实现起来也很简单,只要配置好按钮和对应的文字就可以。但是如果设计的同学不按常理出牌,比如像咸鱼那样,搞5个按钮,其中有一个还特别大。如下图:
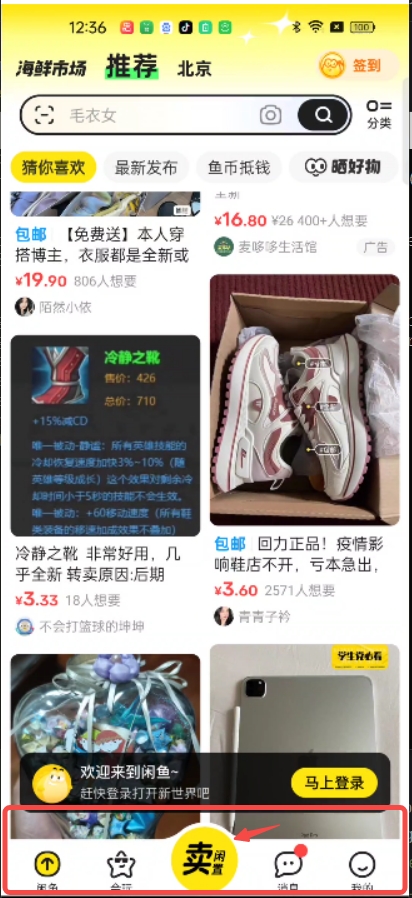 那阁下该如何应对呢。本文就介绍下如何实现这样的底部导航栏。
2. 效果展示
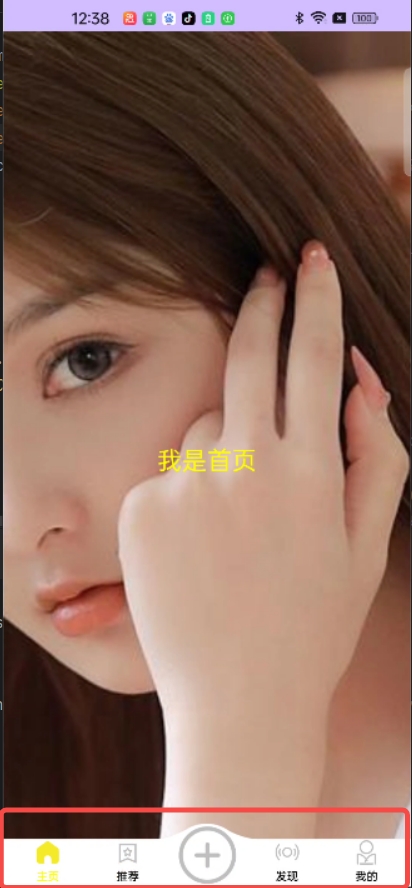
实现其实也不难,只需要设计的小朋友给咱们切一张背景图,就是上图中的带弧形的背景图给我们,我们再绘制到底部导航栏的背后就行了,先看下效果:
3. 代码实现
3.1 定义底部导航栏的tab项
经过观察我们可以发现底部导航栏的显示有图标和文字,并且选中的时候颜色会变化,所以我们需要定义一个类来保存这些状态,代码如下:
sealed class ScreenPage(
    val route: String,
    @StringRes val resId: Int = 0, // 如果没有文字标题,就不需要使用这个属性
    val iconSelect: Int,
    val iconUnselect: Int,
    var isShowText: Boolean = true
) {
    object Home : ScreenPage(
        route = "home",
        resId = R.string.str_main_title_home,
        iconSelect = R.drawable.ic_home_selected,
        iconUnselect = R.drawable.ic_home_unselected
    )
    object Recommend : ScreenPage(
        route = "recommend",
        resId = R.string.str_main_title_recommend,
        iconSelect = R.drawable.ic_recom_selected,
        iconUnselect = R.drawable.ic_recom_unselected
    )
    object Capture : ScreenPage(
        route = "add",
        iconSelect = R.drawable.ic_add_selected,
        iconUnselect = R.drawable.ic_add_unselected,
        isShowText = false
    )
    object Find : ScreenPage(
        route = "find",
        resId = R.string.str_main_title_find,
        iconSelect = R.drawable.ic_find_selected,
        iconUnselect = R.drawable.ic_find_unselected
    )
    object Mine : ScreenPage(
        route = "mine",
        resId = R.string.str_main_title_mine,
        iconSelect = R.drawable.ic_mine_selected,
        iconUnselect = R.drawable.ic_mine_unselected
    )
}
如上面的代码所示,我们在对应的tab中添加上展示的文字的资源ID,选中和未选中的图片资源ID,以及路由,当我们需要切换到其他tab时改变这些属性就可以了,路由可以帮助我们跳转到其他页面。是否显示title的属性可以帮助我们自定义底部Tab的样式
注意:图中的图标资源可以去阿里的矢量图标库下载 阿里矢量图标库地址
3.2 整体页面架构搭建
使用Scaffold搭建页面的架构,这里的Scaffold需要特别注意,我们用到的是material中的Scafold,不是material3中的那个 代码如下:
    val items = listOf(
        ScreenPage.Home,
        ScreenPage.Recommend,
        ScreenPage.Capture,
        ScreenPage.Find,
        ScreenPage.Mine
    )
    val navController = rememberNavController()
    val context = LocalContext.current
    Scaffold(
        bottomBar = {.....省略底部导航栏的代码,这部分单独介绍......}
        },
        backgroundColor = Color.LightGray
    ) { paddingValues ->
        Log.d("walt-zhong", "paddingValues: $paddingValues")
        NavHost(
            navController,
            startDestination = ScreenPage.Home.route,
//            modifier = Modifier.padding(paddingValues)
// 加了会导致底部多出一些padding导致影响透明背景的显示
        ) {
            composable(ScreenPage.Home.route) {
                HomePage()
            }
            composable(ScreenPage.Recommend.route) {
                RecPage()
            }
            composable(ScreenPage.Capture.route) {
                // CapturePage()
            }
            composable(ScreenPage.Find.route) {
                // FindPage()
            }
            composable(ScreenPage.Mine.route) {
                // MinePage()
            }
        }
    }
我们使用Compose的navigation做页面导航,这里就不介绍相关的知识了,有兴趣的自行百度。然后配置好需要跳转的页面
这里需要注意的是,不要将Scaffold提供的padding值设置给底部导航栏或者是NavHost,因为这样会导致我们的透明背景被遮挡,导致无法显示弧形的底部导航栏效果。
3.3 底部导航栏的实现
底部导航栏的实现主要有背景的绘制,选中tab的状态变更以及对应页面的切换,代码如下:
  BottomAppBar(
                elevation = 0.dp,
                backgroundColor = Color.Transparent,
                contentColor = Color.Transparent,
                modifier = Modifier
                    .wrapContentHeight()
                    .fillMaxWidth()
                    .drawWithCache {
                        val bgImg = ContextCompat.getDrawable(
                            context,
                            R.drawable.main_nav_bg
                        )
                        onDrawBehind {
                            bgImg!!.updateBounds(
                                0,
                                0, // 这里可以调整中间的大按钮的上下位置。
                                size.width.toInt(),
                                size.height.toInt()
                            )
                            bgImg.draw(drawContext.canvas.nativeCanvas)
                        }
                    }
            ) {
                val navBackStackEntry by navController.currentBackStackEntryAsState()
                val currentDestination = navBackStackEntry?.destination
                var isSelected: Boolean
                items.forEach { screenPage ->
                    isSelected =
                        currentDestination?.hierarchy?.any { it.route == screenPage.route } == true
                    CompositionLocalProvider(LocalRippleTheme provides NoRippleTheme) {
                        BottomNavigationItem(
                            selected = isSelected,
                            selectedContentColor = Color(0xFF037FF5),
                            unselectedContentColor = Color(0xFF31373D),
                            onClick = {
                                navController.navigate(screenPage.route) {
                                    //点击Item时,清空栈内到NavOptionsBuilder.popUpTo ID之间的所有Item
                                    // 避免栈内节点的持续增加,同时saveState用于界面状态的恢复
                                    popUpTo(navController.graph.findStartDestination().id) {
                                        saveState = true
                                    }
                                    // 避免多次点击Item时产生多个实列
                                    launchSingleTop = true
                                    // 当再次点击之前的Item时,恢复状态
                                    restoreState = true
                                }
                            },
                            icon = {
                                Image(
                                    painter = if (isSelected) {
                                        painterResource(screenPage.iconSelect)
                                    } else {
                                        painterResource(screenPage.iconUnselect)
                                    },
                                    null,
                                    modifier = if (!screenPage.isShowText) {
                                        Modifier.size(58.dp)
                                    } else {
                                        Modifier.size(25.dp)
                                    },
                                    contentScale = ContentScale.Crop
                                )
                            },
                            alwaysShowLabel = screenPage.isShowText,
                            label =
                            if (!screenPage.isShowText) {
                                null
                            } else {
                                {
                                    Text(
                                        text = stringResource(screenPage.resId),
                                        style = TextStyle(
                                            fontSize = 10.sp,
                                            fontWeight = FontWeight.Medium,
                                            color = if (isSelected) {
 Color.Yellow
                                            } else {
 Color.Black
                                            }
                                        )
                                    )
                                }
                            },
                            modifier = if (screenPage.isShowText) {
                                Modifier.padding(top = 10.dp)
                            } else {
                                Modifier.padding(top = 0.dp)
                            }
                        )
                    }
                }
            }
上面的代码应该都很好懂,所以我们就只讲下绘制背景部分,其他的读者可以自行阅读代码,绘制背景部分的代码是:
   Modifier.drawWithCache {
    val bgImg = ContextCompat.getDrawable(
        context,
        R.drawable.main_nav_bg
    )
    onDrawBehind {
        bgImg!!.updateBounds(
            0,
            0, // 这里可以调整中间的大按钮的上下位置。
            size.width.toInt(),
            size.height.toInt()
        )
        bgImg.draw(drawContext.canvas.nativeCanvas)
    }
}
这里我们可以使用Modiofier.drawBehind { }方法,但是这个方法会在每次重组的时候重新走一遍,所以我们使用Modifier.drawWithCache来优化它。这里我们将弧形背景绘制到底部导航栏的后面。就呈现出来一个弧形的底部导航栏,这时候我们还需要绘制tab,我们可以根据配置去改变TAB的图标大小和状态。添加动画等。
在这里我们还需要注意的是我们需将底部导航栏BottomAppBar的背景设置成透明的,否则他会影响我们的弧形背景的显示
还有设置文字的时候需要特别注意,如下面的代码所示:
BottomNavigationItem(
    ...省略掉部分不相干代码....
    alwaysShowLabel = screenPage.isShowText,
    label =
    if (!screenPage.isShowText) {
        null
    } else {
        {
            Text(
                text = stringResource(screenPage.resId),
                style = TextStyle(
                    fontSize = 10.sp,
                    fontWeight = FontWeight.Medium,
                    color = if (isSelected) {
                        Color.Yellow
                    } else {
                        Color.Black
                    }
                )
            )
        }
    },
    modifier = if (screenPage.isShowText) {
        Modifier.padding(top = 10.dp)
    } else {
        Modifier.padding(top = 0.dp)
    }
)
如上面的代码所示,我们想要底部的部分Tab显示的时候不展示文字,这时就需要将alwaysShowLabel设置成false,但是这时候设置 label的时候,需要设置成null,否则我们的Tab显示会不正常,因为文字部分虽然不显示,但是内容还是占据着UI中的位置,导致不显示文字的TAB位置不正确。
3.4 所有代码
class BottomNavAct : ComponentActivity() {
    override fun onCreate(savedInstanceState: Bundle?) {
        super.onCreate(savedInstanceState)
        setContent {
            MyComposeTheme {
                // A surface container using the 'background' color from the theme
                Surface(
                    modifier = Modifier.fillMaxSize(),
                    color = MaterialTheme.colorScheme.background
                ) {
                    MainContainerPage()
                }
            }
        }
    }
@Composable
fun MainContainerPage() {
    val items = listOf(
        ScreenPage.Home,
        ScreenPage.Recommend,
        ScreenPage.Capture,
        ScreenPage.Find,
        ScreenPage.Mine
    )
    val navController = rememberNavController()
    val context = LocalContext.current
    Scaffold(
        bottomBar = {
            BottomAppBar(
                elevation = 0.dp,
                backgroundColor = Color.Transparent,
                contentColor = Color.Transparent,
                modifier = Modifier
                    .wrapContentHeight()
                    .fillMaxWidth()
                    .drawWithCache {
                        val bgImg = ContextCompat.getDrawable(
                            context,
                            R.drawable.main_nav_bg
                        )
                        onDrawBehind {
                            bgImg!!.updateBounds(
                                0,
                                0, // 这里可以调整中间的大按钮的上下位置。
                                size.width.toInt(),
                                size.height.toInt()
                            )
                            bgImg.draw(drawContext.canvas.nativeCanvas)
                        }
                    }
            ) {
                val navBackStackEntry by navController.currentBackStackEntryAsState()
                val currentDestination = navBackStackEntry?.destination
                var isSelected: Boolean
                items.forEach { screenPage ->
                    isSelected =
                        currentDestination?.hierarchy?.any { it.route == screenPage.route } == true
                    CompositionLocalProvider(LocalRippleTheme provides NoRippleTheme) {
                        BottomNavigationItem(
                            selected = isSelected,
                            selectedContentColor = Color(0xFF037FF5),
                            unselectedContentColor = Color(0xFF31373D),
                            onClick = {
                                navController.navigate(screenPage.route) {
                                    //点击Item时,清空栈内到NavOptionsBuilder.popUpTo ID之间的所有Item

                                    // 避免栈内节点的持续增加,同时saveState用于界面状态的恢复
                                    popUpTo(navController.graph.findStartDestination().id) {
                                        saveState = true
                                    }
                                    // 避免多次点击Item时产生多个实列
                                    launchSingleTop = true
                                    // 当再次点击之前的Item时,恢复状态
                                    restoreState = true
                                }
                            },
                            icon = {
                                Image(
                                    painter = if (isSelected) {
                                        painterResource(screenPage.iconSelect)
                                    } else {
                                        painterResource(screenPage.iconUnselect)
                                    },
                                    null,
                                    modifier = if (!screenPage.isShowText) {
                                        Modifier.size(58.dp)
                                    } else {
                                        Modifier.size(25.dp)
                                    },
                                    contentScale = ContentScale.Crop
                                )
                            },
                            alwaysShowLabel = screenPage.isShowText,
                            label =
                            if (!screenPage.isShowText) {
                                null
                            } else {
                                {
                                    Text(
                                        text = stringResource(screenPage.resId),
                                        style = TextStyle(
                                            fontSize = 10.sp,
                                            fontWeight = FontWeight.Medium,
                                            color = if (isSelected) {
 Color.Yellow
                                            } else {
 Color.Black
                                            }
                                        )
                                    )
                                }
                            },
                            modifier = if (screenPage.isShowText) {
                                Modifier.padding(top = 10.dp)
                            } else {
                                Modifier.padding(top = 0.dp)
                            }
                        )
                    }
                }
            }
        },
        backgroundColor = Color.LightGray
    ) { paddingValues ->
        Log.d("walt-zhong", "paddingValues: $paddingValues")
        NavHost(
            navController,
            startDestination = ScreenPage.Home.route,

// modifier = Modifier.padding(paddingValues) // 加了会导致底部多出一些padding导致影响透明背景的示
        ) {
            composable(ScreenPage.Home.route) {
                HomePage()
            }
            composable(ScreenPage.Recommend.route) {
                RecPage()
            }
            composable(ScreenPage.Capture.route) {
                // CapturePage()
            }
            composable(ScreenPage.Find.route) {
                // FindPage()
            }
            composable(ScreenPage.Mine.route) {
                // MinePage()
            }
        }
    }
}
object NoRippleTheme : RippleTheme {
    @Composable
    override fun defaultColor(): Color = Color.Unspecified
    @Composable
    override fun rippleAlpha(): RippleAlpha =
        RippleAlpha(0.0f, 0.0f, 0.0f, 0.0f)
}
sealed class ScreenPage(
    val route: String,
    @StringRes val resId: Int = 0, // 如果没有文字标题,就不需要使用这个属性
    val iconSelect: Int,
    val iconUnselect: Int,
    var isShowText: Boolean = true
) {
    object Home : ScreenPage(
        route = "home",
        resId = R.string.str_main_title_home,
        iconSelect = R.drawable.ic_home_selected,
        iconUnselect = R.drawable.ic_home_unselected
    )
    object Recommend : ScreenPage(
        route = "recommend",
        resId = R.string.str_main_title_recommend,
        iconSelect = R.drawable.ic_recom_selected,
        iconUnselect = R.drawable.ic_recom_unselected
    )
    object Capture : ScreenPage(
        route = "add",
        iconSelect = R.drawable.ic_add_selected,
        iconUnselect = R.drawable.ic_add_unselected,
        isShowText = false
    )
    object Find : ScreenPage(
        route = "find",
        resId = R.string.str_main_title_find,
        iconSelect = R.drawable.ic_find_selected,
        iconUnselect = R.drawable.ic_find_unselected
    )
    object Mine : ScreenPage(
        route = "mine",
        resId = R.string.str_main_title_mine,
        iconSelect = R.drawable.ic_mine_selected,
        iconUnselect = R.drawable.ic_mine_unselected
    )
}
4.总结
本文主要介绍了一个特殊有趣的底部导航栏的实现方法,在大型项目的开发中,底部导航栏会被当成一个单独的模块维护,这就需要将底部导航栏抽取出来,本文只做一个抛砖引玉的作用,读者感兴趣可以试着抽取一下,我在项目中是抽取出来作为单独的模块的,发现的问题是抽取出来后 BottomNavigationItem的selectedContentColor 和unselectedContentColor 对于文字不生效了。最后我的解决方法是通过selected属性去动态修改对应的字体颜色和图片,在使用过程中读者有问题的话可以评论区一起交流
")
")
")
")
还没有评论,来说两句吧...