

Mars3D手把手开发教程(vue3)
1. Mars3D是什么?
Mars3D三维可视化平台 是火星科技 (opens new window)研发的一款基于 WebGL 技术实现的三维客户端开发平台,基于Cesium (opens new window)优化提升与B/S架构设计,支持多行业扩展的轻量级高效能GIS开发平台,能够免安装、无插件地在浏览器中高效运行,并可快速接入与使用多种GIS数据和三维模型,呈现三维空间的可视化,完成平台在不同行业的灵活应用。
为企业提供敏捷高效的数字孪生可视化开发能力,助力企业加速数字化转型
2.Vue3项目中集成mars3D
(1)安装依赖
npm install vite-plugin-mars3d --save-dev
(2)修改 vite.config.ts 配置文件
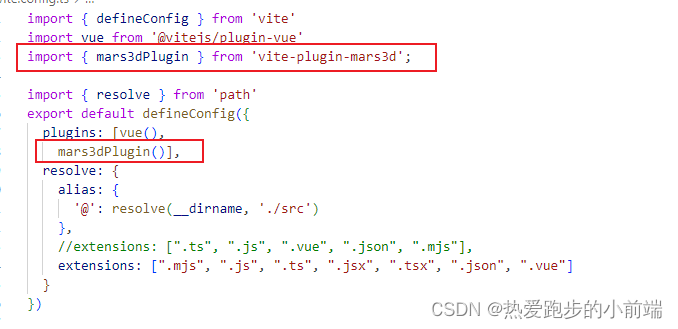
(3)新建一个map.ts文件,底下代码直接复制
import * as mars3d from "mars3d"
import { Cesium } from "mars3d"
import "mars3d/dist/mars3d.css";
import "mars3d-cesium/Build/Cesium/Widgets/widgets.css";
// 定义全局地图变量
export let map: mars3d.Map | null = null;
//必须有这两行css,否则地球出来了,样式还是乱的
export function initMap() {
  // 创建三维地球场景
  map = new mars3d.Map("mars3dContainer", {
    scene: {
       center: { lat: 30.054604, lng: 108.885436, alt: 17036414, heading: 0, pitch: -90 },// 初始视角中心点和方向
        showSun: true, // 显示太阳
        showMoon: true, // 显示月亮
        showSkyBox: true, // 显示天空盒
        showSkyAtmosphere: false, // 关闭球周边的白色轮廓
        fog: true, // 开启雾效
        fxaa: true, // 开启FXAA抗锯齿
        globe: {
          showGroundAtmosphere: false, // 关闭球表面的大气效果
          depthTestAgainstTerrain: false,
          baseColor: "#546a53" // 球体基础颜色
        },
        cameraController: {
          zoomFactor: 3.0, // 缩放因子
          minimumZoomDistance: 1, // 最小缩放距离
          maximumZoomDistance: 50000000, // 最大缩放距离
          enableRotate: true, // 允许旋转
          enableZoom: true // 允许缩放
        },
        mapProjection: mars3d.CRS.EPSG3857, // 地图投影方式,这里是墨卡托投影
        mapMode2D: Cesium.MapMode2D.INFINITE_SCROLL // 2D模式下,地图可以无限滚动
      },
    control: {
      baseLayerPicker: true, // basemaps底图切换按钮
      homeButton: false, // 视角复位按钮
      sceneModePicker: false, // 二三维切换按钮
      navigationHelpButton: false, // 帮助按钮
      fullscreenButton: true, // 全屏按钮
      contextmenu: { hasDefault: false } // 右键菜单
    },
    terrain: {
        url: "//data.mars3d.cn/terrain", // 地形数据的URL
        show: true // 显示地形
      },
    basemaps: [
      {
          name: "暗色底图",
          type: "gaode",
          icon: "img/basemaps/blackMarble.png",
          layer: "vec",
          invertColor: true,
          filterColor: "#4e70a6",
          brightness: 0.6,
          contrast: 1.8,
          gamma: 0.3,
          hue: 1,
          saturation: 0
          show: true
      }
    ] as any,
  })
  return map
}
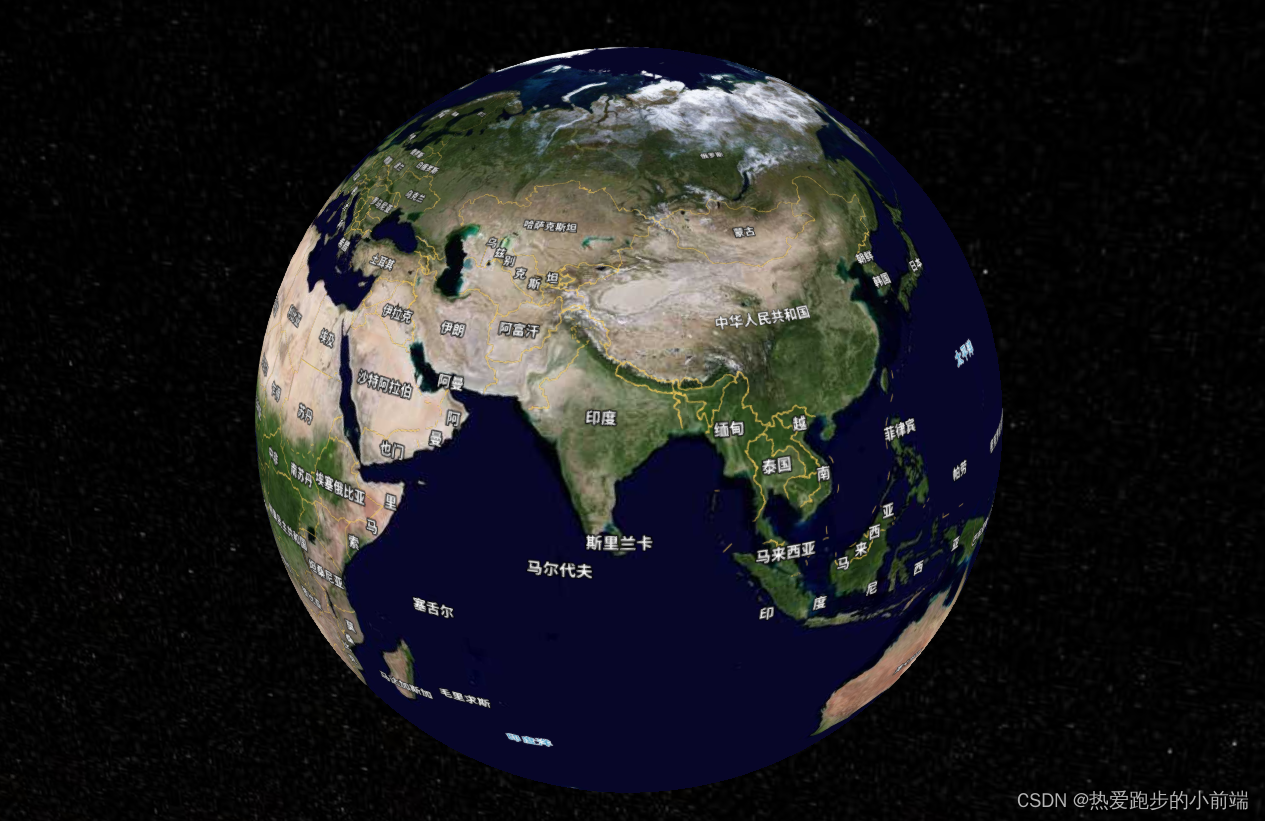
(4)新建地图盒子,引入map.ts文件
import { onMounted, ref } from 'vue';
import * as mars3d from "mars3d"
import { initMap,map  } from "../map";
//加载地图
onMounted(() => {
    initMap();
});

.mars3d-container {
    width: 100%;
    height: 100%;
}
自此,一个美丽的地图就出来了
(5)如果要将视角移动到你设置的城市那里,改写map.ts文件中这个
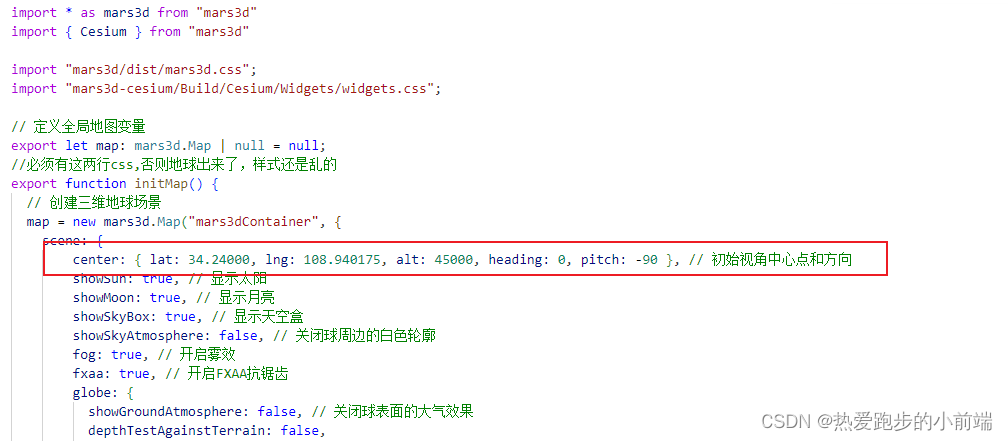
(6)想要更换地图,更改map.ts文件中的basemaps更换底图,什么天地图,高德图,百度图,蓝色黑色地图等等

3.地图点位标注
创建图层-将图层添加到地图-创建点位对象-将点对象添加到图层
        import { onMounted, ref } from 'vue';
        import * as mars3d from "mars3d"
        import { initMap, map } from "../map";
        import tb from '@/assets/image/hyfw.png'
        const arr = [
            { grid: '{"type":"Point","coordinates":[109.006887,34.232718]}', name: '测试', remark: 'xx区' },
           //其他数据...
        ];
        onMounted(() => {
            initMap();
            mapKindergarten()
            console.log(map, 'map');
        });
        let pointLayer: any;
        /**
        * Date:2024/3/21
        * Author:zx
        * Function:【地图点分布】
        * @param 无
        */
        const mapKindergarten = () => {
            // 初始化地图
            // 创建一个用于存放所有点位的图层
            pointLayer = new mars3d.layer.GraphicLayer({
                name: 'PointLayer',
                hasEdit: false,
                isAutoEditing: false
            });
            // 将图层添加到地图
            map.addLayer(pointLayer);
            // 遍历数组,为每个点位数据创建图形点
            arr.forEach((pointData: any) => {
                // 解析点位的坐标
                const coordinates = JSON.parse(pointData.grid).coordinates;
                // 创建 Mars3D 中的点对象(默认点位样式)
                //                 const pointGraphic = new mars3d.graphic.PointEntity({
                //                 position: coordinates,
                //                 attr: pointData,
                //                 style: {
                //                     color: mars3d.Cesium.Color.RED,
                //                     pixelSize: 10,
                //                     scale: 1,
                //                     image: undefined,
                //                 }
                // });
                // 创建自定义图标点
                // 创建 Mars3D 中的点对象(默认点位样式)
                const pointGraphic = new mars3d.graphic.BillboardEntity({
                    position: coordinates,
                    attr: pointData,
                    style: {
                        pixelSize: 10,
                        scale: 0.5,
                        image: tb,
                    }
                });
                // 添加点位点击事件
                pointGraphic.on(mars3d.EventType.click, function (event: any) {
                    console.log('点击了点位', event);
                });
                // 将点对象添加到图层
                pointLayer.addGraphic(pointGraphic);
            });
        };


.mars3d-container {
    width: 100%;
    height: 100%;
}
效果图

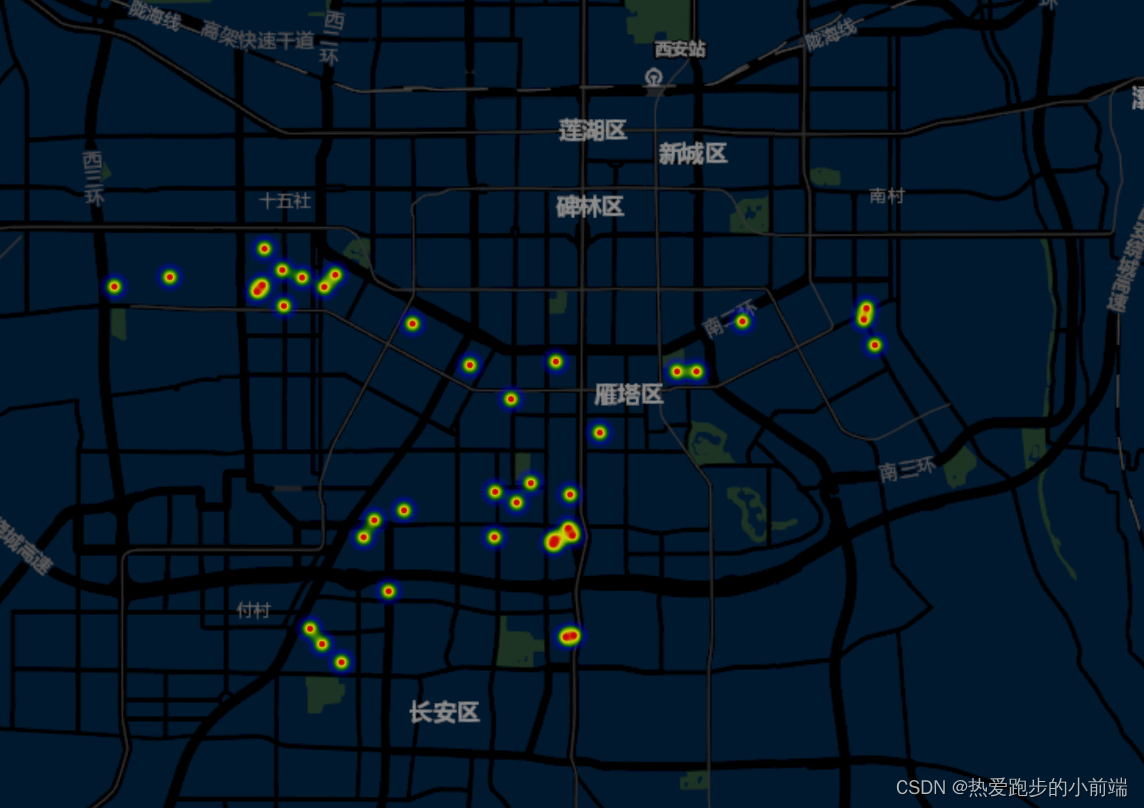
4.热力图
(1)安装热力图库
npm install mars3d-heatmap
(2)引入库
import "mars3d-heatmap"
(3)写函数
注: 创建热力图层,添加图层,再调用函数
arr就是前面点位标注函数的arr数据
 /**
        * Date:2024/3/21
        * Author:zx
        * Function:【热力图】
        * @param 无
        */
        let heatLayer: any = null
        const mapKindergartenHeatmap = () => {
            let arrPoints: any = []
            arr.forEach((item: any) => {
                if (item.point || item.grid) {
                    let pointData = item.point ? JSON.parse(item.point).coordinates : JSON.parse(item.grid).coordinates
                    arrPoints.push({ lng: pointData[0], lat: pointData[1], value: 1 })
                }
            })
            if (heatLayer) {
                map.removeLayer(heatLayer)
                heatLayer = null
            }

            // 热力图 图层
            heatLayer = new mars3d.layer.HeatLayer({
                name: "Point",
                positions: arrPoints,
                heatStyle: {
                radius: 40,
                blur: 0.85,
                gradient: { 0.4: 'blue', 0.6: 'green',0.9: 'yellow',1: 'red' }
                },
                // 以下为矩形矢量对象的样式参数
                style: {
                    arc: false, // 是否为曲面
                    height: 10
                },
                // flyTo: true,
            })
            map.addLayer(heatLayer)
        };
效果如下
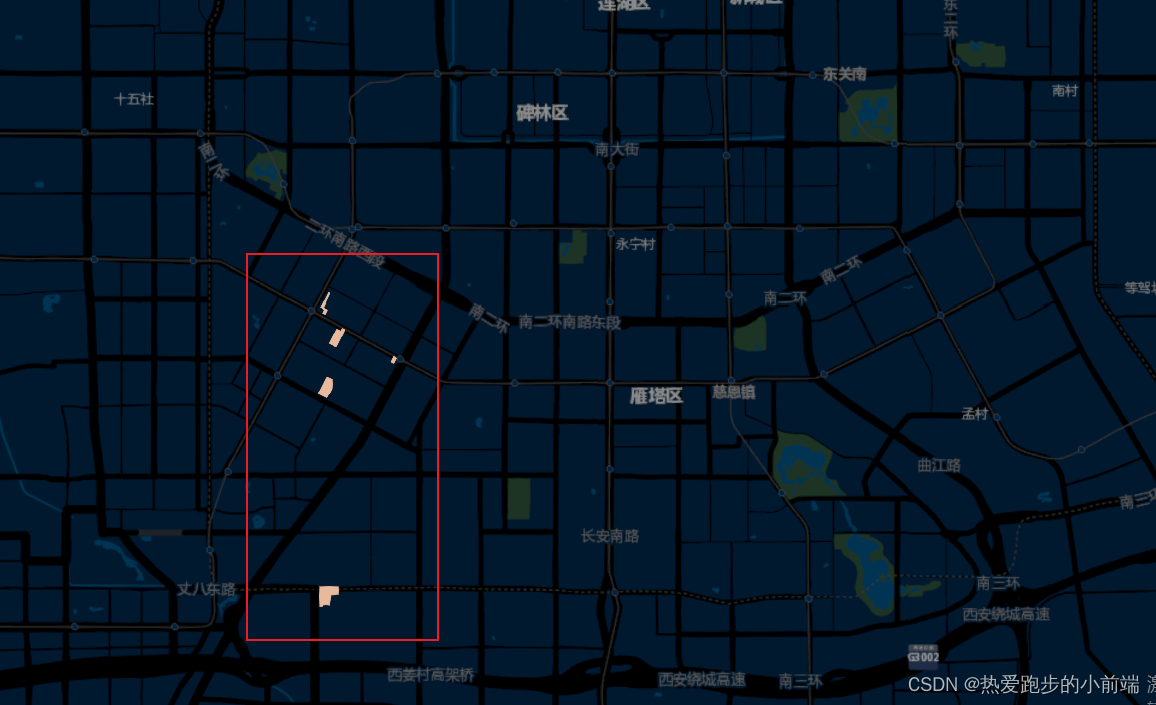
5.地图面分布
创建面图层-将面图层添加到地图-创建多边形对象-将面对象添加到图层
下面是根据数据生成面的函数, polygonData是后台数据 ,我模拟了个别
        /**
        * Date:2024/3/21
        * Author:zx
        * Function:【地图面分布】
        * @param 无
        */
        let polygonData = ref( [
  {
    grid: {
      type: "Polygon",
      coordinates: [
        [
          [108.901467, 34.22501],
          [108.90235, 34.224611],
          [108.902374, 34.223664],
          [108.90208, 34.223183],
          [108.901581, 34.222639],
          [108.901447, 34.222412],
          [108.901445, 34.222413],
          [108.901417, 34.222425],
          [108.901366, 34.222449],
          [108.90134, 34.22246],
          [108.901334, 34.222463],
          [108.901295, 34.22248],
          [108.901291, 34.222482],
          [108.901232, 34.222509],
          [108.901189, 34.222527],
          [108.901173, 34.222534],
          [108.901103, 34.222568],
          [108.901033, 34.222601],
          [108.900963, 34.222635],
          [108.900906, 34.22266],
          [108.900899, 34.222663],
          [108.900827, 34.222695],
          [108.900821, 34.222697],
          [108.900732, 34.222737],
          [108.900636, 34.222778],
          [108.900541, 34.22282],
          [108.900446, 34.222862],
          [108.90035, 34.222904],
          [108.900292, 34.22293],
          [108.900234, 34.222956],
          [108.900171, 34.222983],
          [108.900783, 34.223906],
          [108.901467, 34.22501]
        ]
      ]
    },
    num: 1,
    name: "中天花园"
  },  {
    grid: {
      type: "Polygon",
      coordinates: [
        [
        [108.903272,34.19876],
        [108.902163,34.198774],
        [108.902107,34.198582],
        [108.901865,34.197436],
        [108.90172,34.197456],
        [108.900913,34.197557],
        [108.900863,34.197241],[108.900343,34.197292],
        [108.900339,34.199717],[108.90037,34.199792],
        [108.900392,34.199849],[108.903211,34.19984],
        [108.903251,34.199807],[108.903278,34.199785],
        [108.903273,34.199352],[108.903272,34.19876]
        ]
      ]
    },
    num: 1,
    name: "xx花园"
  },
  {
    grid: {
      type: "Polygon",
      coordinates: [
        [
        [108.911196,34.22649],
        [108.910652,34.22675],[108.911124,34.22748],
        [108.911472,34.227295],[108.911621,34.227229],
        [108.911196,34.22649]
        ]
      ]
    },
    num: 1,
    name: "xx花园"
  },
  {
    grid: {
      type: "Polygon",
      coordinates: [
        [
        [108.901062,34.232978],[108.901054,34.233017],
        [108.900955,34.233057],[108.900473,34.233278],
        [108.900505,34.233331],[108.900542,34.233393],
        [108.90058,34.233455],[108.900625,34.233524],
        [108.900669,34.233593],[108.900717,34.233666],
        [108.900765,34.23374],[108.900813,34.233813],
        [108.900856,34.233877],[108.900898,34.23394],
        [108.900941,34.234004],[108.900983,34.234067],
        [108.901015,34.234114],[108.901023,34.234127],
        [108.901068,34.234196],[108.901112,34.234264],
        [108.901156,34.234333],[108.9012,34.234401],
        [108.901245,34.23447],[108.901289,34.234538],
        [108.901333,34.234607],[108.90138,34.23468],[
        108.901427,34.234752],[108.901473,34.234825],
        [108.90152,34.234897],[108.901567,34.23497],
        [108.901583,34.234995],[108.901618,34.235048],
        [108.901653,34.235102],[108.901688,34.235156],
        [108.90169,34.235161],[108.901703,34.235183],
        [108.901987,34.235047],[108.901305,34.233942],
        [108.901418,34.233891],[108.901066,34.233256],
        [108.901635,34.232992],[108.901228,34.23234],
        [108.901179,34.232363],[108.901094,34.232402],
        [108.901009,34.232441],[108.900923,34.232479],
        [108.900838,34.232518],[108.900798,34.232537],
        [108.90079,34.23254],[108.901062,34.232978]
        ]
      ]
    },
    num: 1,
    name: "xx花园"
  },
  {
    grid: {
      type: "Polygon",
      coordinates: [
        [
        [108.903119,34.228991],
        [108.902817,34.228477],
        [108.90172,34.228988],
        [108.901765,34.229057],
        [108.90181,34.229128],
        [108.901856,34.229198],
        [108.901901,34.229269],
        [108.901947,34.229339],
        [108.901993,34.22941],
        [108.902031,34.229469],
        [108.902034,34.229474],
        [108.902621,34.229205],
        [108.903119,34.228991]
        ]
      ]
    },
    num: 1,
    name: "xx花园"
  }
  ,
  {
    grid: {
      type: "Polygon",
      coordinates: [
        [
        [108.903443,34.230496],
        [108.903075,34.229939],
        [108.902621,34.229205],
        [108.902034,34.229474],
        [108.902081,34.229546],
        [108.902131,34.229624],
        [108.90218,34.229701],
        [108.90223,34.229778],
        [108.90228,34.229856],
        [108.90233,34.229933],
        [108.90238,34.23001],
        [108.90243,34.230088],
        [108.90248,34.230165],
        [108.90253,34.230243],
        [108.90258,34.23032],
        [108.90263,34.230397],
        [108.902677,34.23047],
        [108.902724,34.230542],
        [108.902772,34.230614],
        [108.902819,34.230687],
        [108.902865,34.230758],
        [108.903443,34.230496]
        ]
      ]
    },
    num: 1,
    name: "xx花园"
  },
  {
    grid: {
      type: "Polygon",
      coordinates: [
        [
        [108.904156,34.230607],
        [108.903706,34.229914],
        [108.903119,34.228991],
        [108.902621,34.229205],
        [108.903075,34.229939],
        [108.903443,34.230496],
        [108.903656,34.230842],
        [108.904156,34.230607]
        ]
      ]
    },
    num: 1,
    name: "xx花园"
  }
])
        const mapKindergartenFace = () => {
            // 创建一个用于存放所有面的图层
            const polygonLayer = new mars3d.layer.GraphicLayer({
                name: 'PolygonLayer',
                hasEdit: false,
                isAutoEditing: false
            });
            // 将图层添加到地图
            map.addLayer(polygonLayer);
            // 遍历数组,为每个面数据创建多边形
            polygonData.value.forEach((polygonCoords: any) => {
                // 解析多边形的坐标
                const coordinates = JSON.parse(polygonCoords.grid).coordinates; // 这里假设polygonCoords是一个JSON格式的坐标数组
                // 创建 Mars3D 中的多边形对象
                const polygonEntity = new mars3d.graphic.PolygonEntity({
                    positions: coordinates, // 设置多边形的位置坐标数组
                    style: {
                        color: "#e8b99d"
                        // fillColor: mars3d.Cesium.Color.RED.withAlpha(1), // 设置面的填充颜色和透明度
                        // outlineColor: mars3d.Cesium.Color.BLACK, // 设置面的边框颜色
                        // outlineWidth: 10 // 设置面的边框宽度
                    }
                });
                // 将多边形对象添加到图层
                polygonLayer.addGraphic(polygonEntity);
            });
        };
效果如下
6. 地图放大展示点位名称
(1)编写一个相机移动视角的函数(三维地图,不再是地图的缩放,而是视角,)
函数中创建了标签图层,并添加
sceneData.value.alt为相机的高度,也就是地图放大缩小率
   /**
        * Date:2024/3/21
        * Author:zx
        * Function:【相机移动或视角变化】
        * @param 无
        */
        let labelLayer: any = null; // 添加标签的图层
        let sceneData = ref()
        const map_cameraChangedHandler = () => {
            sceneData.value = map.getCameraView();
            // console.log(sceneData.value, '视角');
            // 检查相机高度是否小于 3000
            if (sceneData.value.alt > 10000) {
                // 删除 labelLayer 图层中的标签
                map.getLayers().forEach((item: any) => {
                    if (item.options.name === "LabelLayer") {
                        map.removeLayer(item);
                    }
                })
            } else {
                // 显示标签
                labelLayer = new mars3d.layer.GraphicLayer({
                    name: 'LabelLayer',
                    hasEdit: false,
                    isAutoEditing: false
                });
                map.addLayer(labelLayer);
                // 遍历标签图层中的标签,并添加到图层中
                arr.forEach((pointData: any) => {
                    const coordinates = JSON.parse(pointData.grid).coordinates;
                    // 创建标签图形
                    const labelGraphic = new mars3d.graphic.LabelEntity({
                        position: coordinates,
                        style: {
                            text: pointData.name, // 幼儿园名称
                            font: '16px sans-serif', // 字体大小和样式
                            fillColor: mars3d.Cesium.Color.YELLOW, // 字体颜色
                            // outlineColor: mars3d.Cesium.Color.BLACK, // 字体描边颜色
                            outlineWidth: 1, // 字体描边宽度
                            horizontalOrigin: mars3d.Cesium.HorizontalOrigin.CENTER, // 文本水平对齐方式
                            verticalOrigin: mars3d.Cesium.VerticalOrigin.BOTTOM, // 文本垂直对齐方式
                            pixelOffset: new mars3d.Cesium.Cartesian2(0, -40), // 文本偏移量,使其显示在点的上方
                            disableDepthTestDistance: Number.POSITIVE_INFINITY // 防止标签被遮挡
                        }
                    });
                    // 将标签图形添加到标签图层中
                    labelLayer.addGraphic(labelGraphic);
                });
            }
        };
(2)在点位标注函数那 绑定相机视角事件
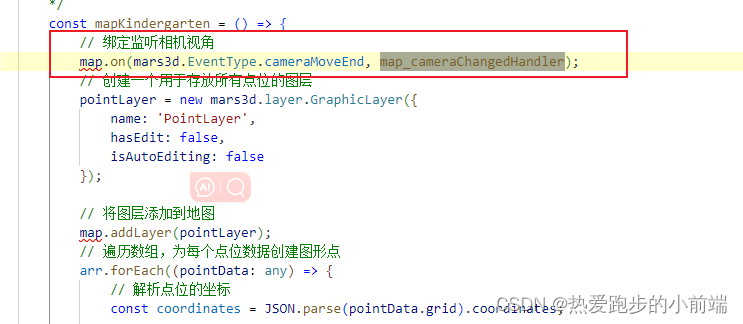
效果如下,可自由设置相机视角高度,实现放大展示点位信息,缩小隐藏点位信息

通过本文,开发者将获得对Mars3D简单的一些操作,更高级的功能小编还在学习中,期待一起进步。
")
")
")

还没有评论,来说两句吧...