

Java如何开发PC客户端(Windows,Mac,Linux)
- 项目编译工具:Gradle 8.2
- 开发工具: Idea
- 开发语言: 建议java17以上
- ui组件:openjfx (org.openjfx.javafxplugin)
- 打包工具: jpackage (org.beryx.jlink)
- 如果打包出现错误,可以安装wix(3.1以上) + dotnetfx(3.5以上) 试试看
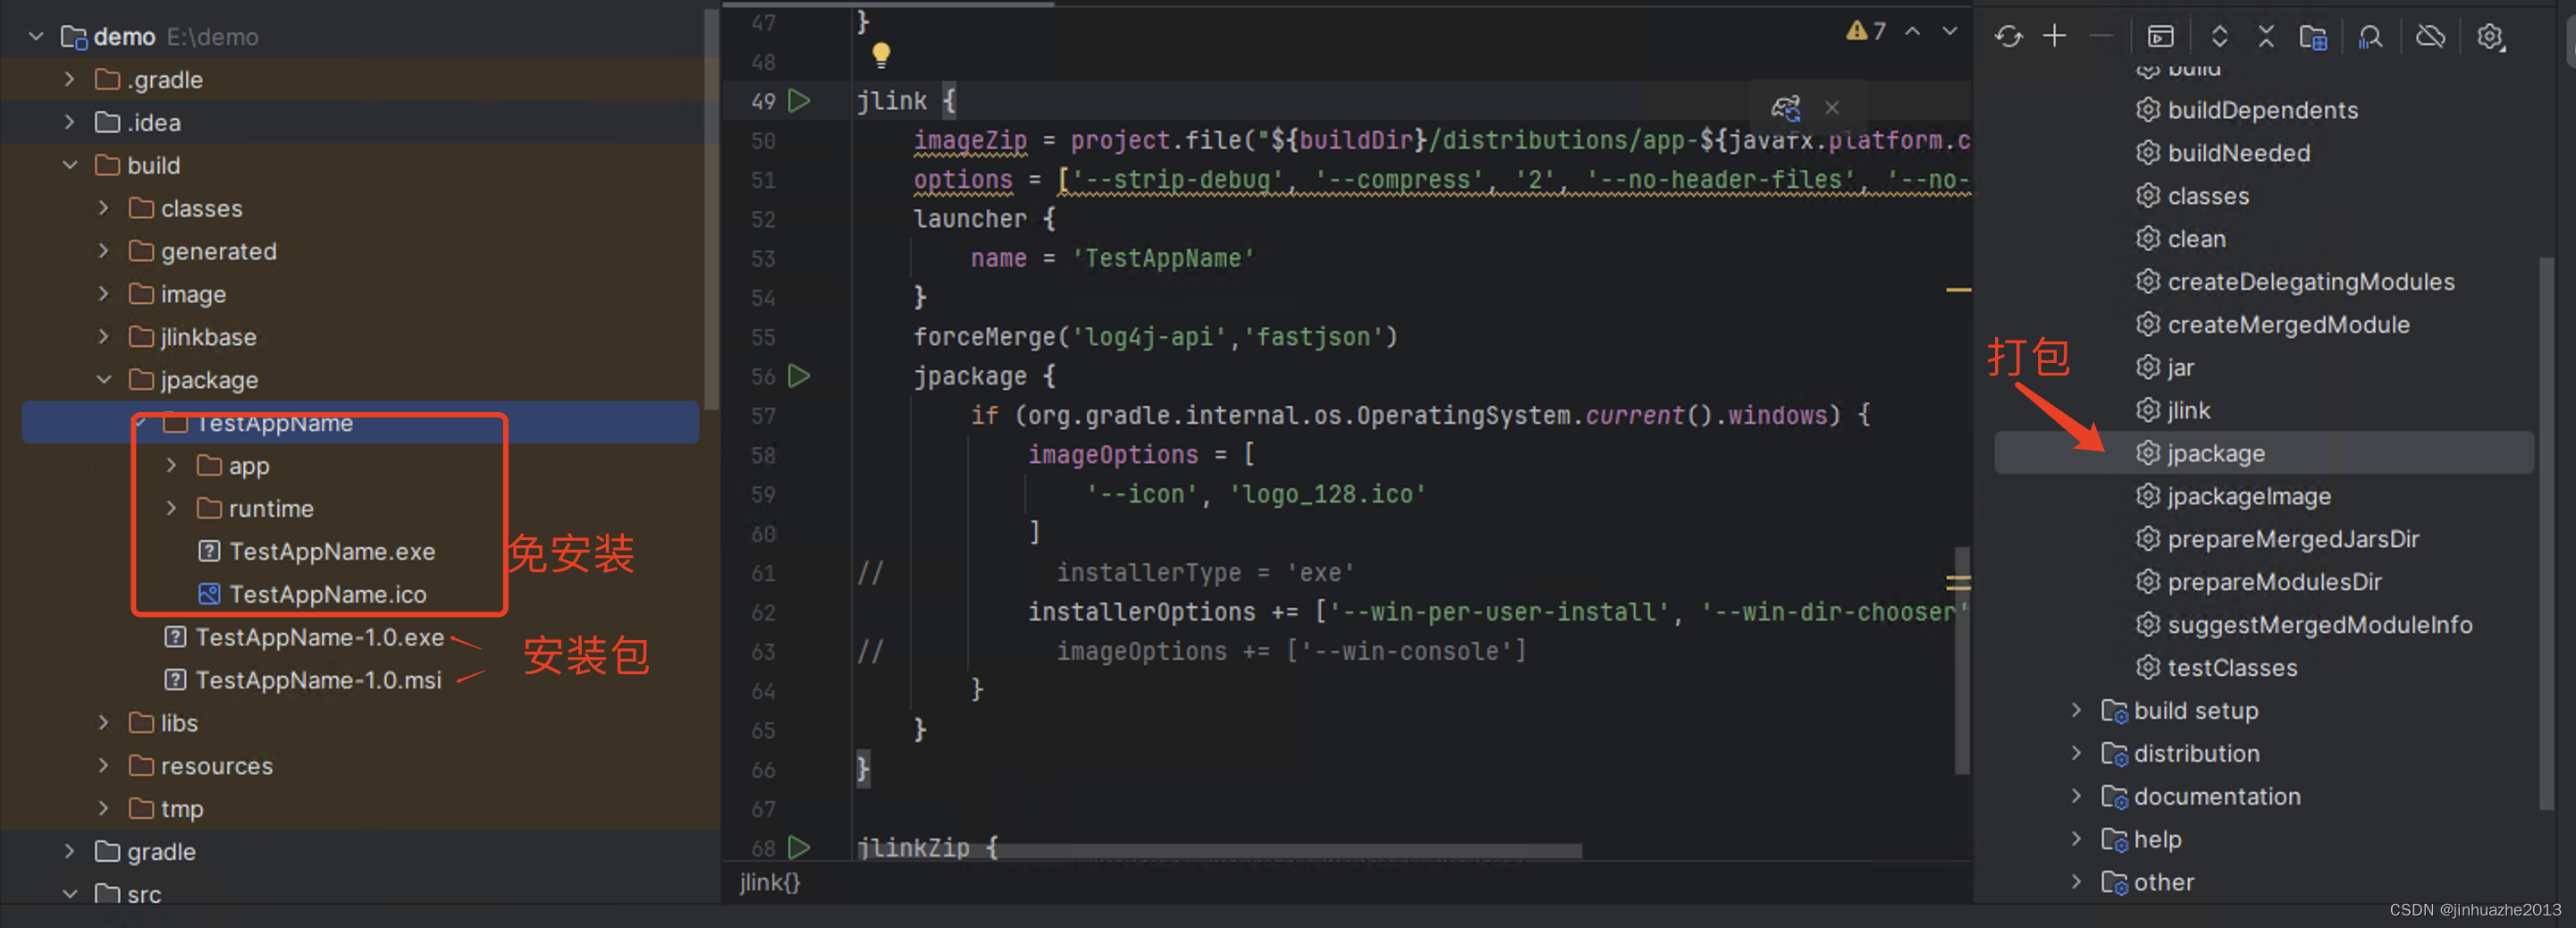
一、如何解决打包问题
java 14以后,有了jpackage工具,能够很方便的打包成exe,msi,dmg等包了。
如果有java环境的机器,可以使用launch4j进行打包(可以指定支持的运行时java环境版本min~max, 参考 https://github.com/charlydang/RestartApplicationButton), 可参考maven插件https://github.com/orphan-oss/launch4j-maven-plugin,这种方式打的包体积很小,但是需要运行的系统安装了对应的jvm环境才好。jpackage更适合没有java环境的机器,可以运行在任何一台机器上。
试了Maven项目的javafx-maven-plugin插件,发现没法打包成可安装的包exe或者msi。
最终选择了gradle管理项目(打包插件:badass-jlink-plugin),如果有idea最新版的话,新建JavaFx、gradle的项目默认用的就是这个插件。不过要稍微改下配置。具体参数配置可以查看github: https://github.com/beryx/badass-jlink-plugin, readme里有介绍几个例子。我是参考这个例子https://github.com/beryx-gist/badass-jlink-example-log4j2-javafx进行的配置。也可以看看这个项目,挺不错的(地址 https://github.com/gleidsonmt/DashboardFx)。
plugins {
    id 'java'
    id 'application'
    id 'org.javamodularity.moduleplugin' version '1.8.12'
    id 'org.openjfx.javafxplugin' version '0.0.13'
    id 'org.beryx.jlink' version '2.25.0'
}
group 'com.example'
version '1.0'
repositories {
    mavenCentral()
}
ext {
    junitVersion = '5.9.1'
}
sourceCompatibility = '17'
targetCompatibility = '17'
dependencies {
    implementation('org.apache.logging.log4j:log4j-core:2.11.1')
    testImplementation("org.junit.jupiter:junit-jupiter-api:${junitVersion}")
    testRuntimeOnly("org.junit.jupiter:junit-jupiter-engine:${junitVersion}")
}
tasks.withType(JavaCompile) {
    options.encoding = 'UTF-8'
}
application {
    mainModule = 'com.example.app'
    mainClass = 'com.example.app.Main'
}
javafx {
    version = '17.0.2'
    modules = ['javafx.controls', 'javafx.fxml']
}
dependencies {
    implementation('org.controlsfx:controlsfx:11.1.2')
    implementation('org.kordamp.bootstrapfx:bootstrapfx-core:0.4.0')
    testImplementation("org.junit.jupiter:junit-jupiter-api:${junitVersion}")
    testRuntimeOnly("org.junit.jupiter:junit-jupiter-engine:${junitVersion}")
}
test {
    useJUnitPlatform()
}
jlink {
    imageZip = project.file("${buildDir}/distributions/app-${javafx.platform.classifier}.zip")
    options = ['--strip-debug', '--compress', '2', '--no-header-files', '--no-man-pages']
    launcher {
    //app名称
        name = 'TestAppName'
    }
    forceMerge('log4j-api','fastjson')
    jpackage {
        if (org.gradle.internal.os.OperatingSystem.current().windows) {
//            installerType = 'exe'
            installerOptions += ['--win-per-user-install', '--win-dir-chooser', '--win-menu', '--win-shortcut']
//            imageOptions += ['--win-console']
        }
    }
}
jlinkZip {
    group = 'distribution'
}
我用idea创建了一个demo项目,提交到github上了,可以在这里看。https://github.com/carlzhangweiwen/hello-world/tree/master/javafx-jpackage-demo
注意,如果要加icon, 那么图片格式必须是ico,不然会报错;
idea默认创建的version会加一个snapshot, jpackage打包的时候会报错,要改成正常的版本号,比如1.0或者1都可以。
jpackage 的配置参数可以通过官网了解: https://docs.oracle.com/en/java/javase/21/docs/specs/man/jpackage.html
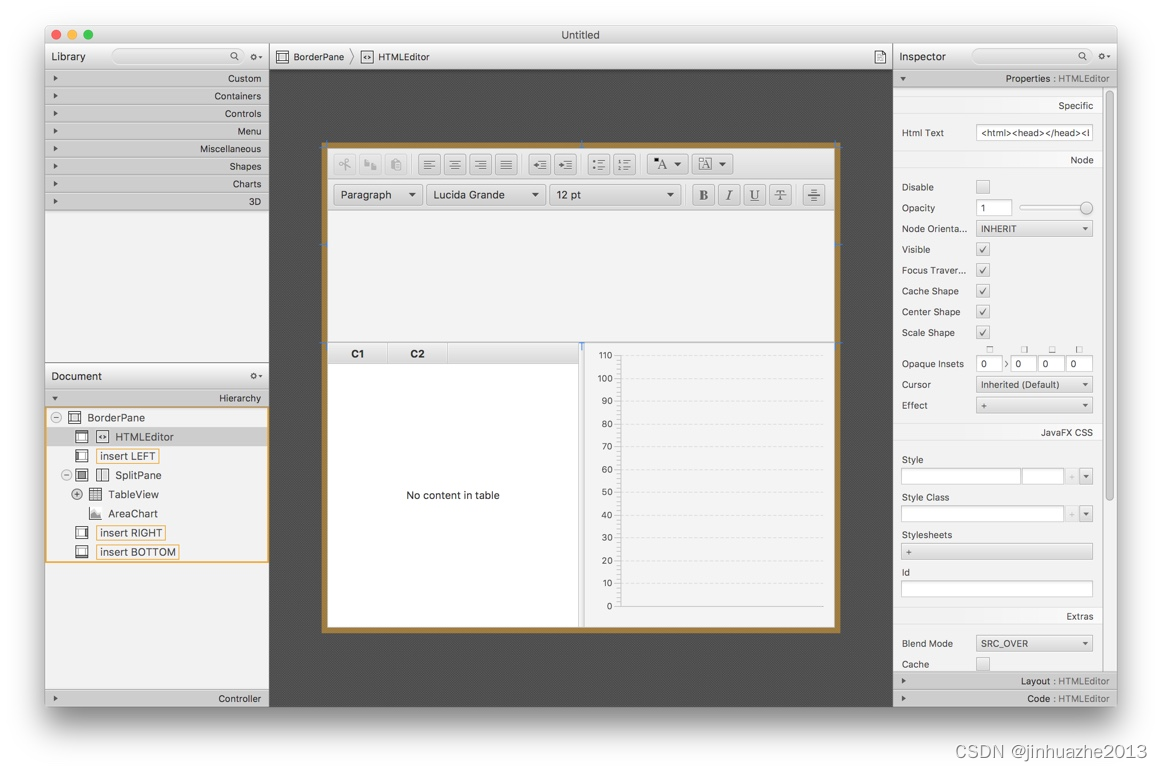
二、JavaFX开发(使用Scene Builder)
JavaFX是类似Android的开发模式,界面布局使用FXML,使用scene builder可以直接拖拽控件进行布局,可视化的布局。界面支持CSS调样式。支持ResourceBoundle,进行国际化设置。控件多,灵活,支持图表展示和WebView.
scene builder 怎么用?可以参考这篇文章https://blog.csdn.net/weixin_41571493/article/details/81415327,写的很详细。
scene builder下载地址 https://gluonhq.com/products/scene-builder/
三、获取程序安装路径
比如程序叫demo,安装到了C://demo , 则可以通过下面命令获取到。那么一些缓存文件等都可以放在这个目录了。
System.getProperty("user.dir")参考自如下命令(如果继承了Application,则会有getHostServices方法可以调用)
final HostServices hostServices = getHostServices();
String codeBase = hostServices.getCodeBase() +"|doc:"+ hostServices.getDocumentBase();
四、选择本地文件或目录
选择一个文件
  @FXML
    private AnchorPane toolAnchorPane;
     @FXML
    void click(ActionEvent event) {
        final Window window = toolAnchorPane.getScene().getWindow();
        FileChooser fileChooser = new FileChooser();
        fileChooser.setTitle("Open Resource File");
        fileChooser.getExtensionFilters().addAll(
                new FileChooser.ExtensionFilter("Text Files", "*.txt"),
                new FileChooser.ExtensionFilter("Image Files", "*.png", "*.jpg", "*.gif"),
                new FileChooser.ExtensionFilter("Audio Files", "*.wav", "*.mp3", "*.aac"),
                new FileChooser.ExtensionFilter("All Files", "*.*"));
        File selectedFile = fileChooser.showOpenDialog(window);

    }
选择目录
     DirectoryChooser directoryChooser = new DirectoryChooser();
        final File selectedFile = directoryChooser.showDialog(window);
        System.out.println(selectedFile);
        folderPath.setText(selectedFile.getAbsolutePath());
五、java如何调用本地函数库
可以采用开源库Java Native Access(jna)。JNA 使 Java 程序可以轻松访问本机共享库(native shared libraries),而无需编写 Java 代码之外的任何内容 - 不需要 JNI 或本机代码。 此功能可与 Windows 的 Platform/Invoke 和 Python 的 ctypes 相媲美。
引入依赖
    implementation("net.java.dev.jna:jna:5.14.0")
    implementation("net.java.dev.jna:jna-platform:5.14.0")
如下是隐藏或展示photoshop的ui,让其在后台运行
import com.sun.jna.Library; import com.sun.jna.Native; import com.sun.jna.Platform; import com.sun.jna.platform.win32.User32; import com.sun.jna.platform.win32.WinDef; public class Demo { // This is the standard, stable way of mapping, which supports extensive // customization and mapping of Java to native types. public interface CLibrary extends Library { CLibrary INSTANCE = (CLibrary) Native.load((Platform.isWindows() ? "msvcrt" : "c"), CLibrary.class); void printf(String format, Object... args); } public static void main(String[] args) { CLibrary.INSTANCE.printf("Hello, World\n"); for (int i=0;i相关文档
- openjfx: https://openjfx.io/
- openjfx关联的文档: https://fxdocs.github.io/docs/html5/
- openjfx关联的文档: https://jenkov.com/tutorials/javafx/index.html
- jna: https://github.com/java-native-access/jna
")
")


还没有评论,来说两句吧...